When it comes to building a steel building, the process may seem daunting at first—but with a high-quality pre-engineered system, detailed instructions, and the right tools, it becomes a smooth and structured operation. Regardless of which Norsteel building system you are working with, the core assembly principles remain the same.
This guide walks you through the key stages of steel building assembly, from frame erection to sheeting and final inspection—so you can confidently bring your project to life.
Assembly Readiness Checklist
Before you begin building a steel building, make sure your site and crew are ready:
- The foundation is fully cured, level, and matches the anchor bolt pattern.
- Delivery has been completed and all components are on site and accounted for.
- You have a forklift, crane, or telehandler appropriate for the building’s size.
- Your crew has reviewed the building drawings and safety protocols.
Weather and lighting conditions are suitable for outdoor work.
For delivery, offloading, and site prep instructions, refer to our EasyBuild or Rigid Frame delivery blogs.
Step-by-Step Assembly Process
Step 1: Assemble and Raise the Frames
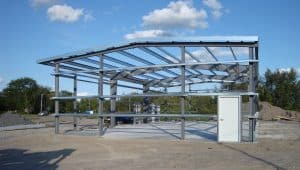
- Assemble the first set of columns and rafters on the foundation slab, following the drawings.
- Do not fully tighten bolts yet—start with finger-tight connections.
- Measure across the base and top of the frame to ensure proper width.
- Square the frame using diagonal measurements and install girt/purlin clips.
- Stack up to three frames flat if space allows, then raise the first frame—starting at a braced bay.
Important: Temporary and permanent bracing is critical to prevent frame twist or failure during erection. Girts and sidewall bracing must be in place before rafters are lifted.

Step 2: Erect Subsequent Frames and Secondary Steel

- Install the adjacent braced frame.
- Add girts (wall supports), purlins (roof supports), and cross bracing progressively.
- Tighten connections progressively as the structure gains stability.
Step 3: Plumbing and Squaring the Building
Accurate alignment is essential when building a steel building. Here’s how to verify:
- Use a plumb bob and string line to ensure frames are upright and straight.
- Adjust cross bracing by tightening or loosening rods evenly.
- Check roof alignment from eave to ridge.
- Ensure the ridge is centered and square to the foundation using consistent measurements.
Spending time here ensures smooth sheeting installation and avoids costly misalignments later.

Step 4: Erect End Walls and Eave Plates

- Once the main frames are up and braced, install the end wall framing.
- Attach eave plates and stabilizers.
- Confirm base angles and closure placements per the erection drawings.
Sheeting and Trim Installation
The sheeting stage determines both the structural rigidity and the final appearance of your steel building. Proper installation helps protect the building from weather, ensures insulation performs correctly, and gives your structure its clean, professional finish.
Wall Sheeting First
- Start sheeting from the least visible side and work toward the main view-facing elevation. This minimizes visible lap joint shadows and improves the final appearance.
- Pre-drill panel stacks to maintain straight screw lines.
- Install insulation and panels simultaneously if applicable, with vapour barrier facing inward.
- Begin at the base and fasten each panel at girts moving upward to the eave.
- Wipe away drill shavings as you go to prevent rust on panels.

Roof Sheeting
- Begin roofing only after lateral bracing and purlin stabilizers are installed.
- Align panel ribs at the ridge; ensure 2″ overhang past the eave trim to avoid icicle buildup.
- Follow wind direction guidance to orient laps away from prevailing weather.
- Use closures, sealants, and tape as specified in your drawings.
- Always use walk boards—never step on major ribs or unsupported panels.
For a detailed overview of roofing types and installation techniques, refer to our article: Metal Roofing Systems for Steel Buildings: Types, Installation & How to Choose.
Installing Accessories
- Follow the erection drawings closely to locate and install all accessories, including:
- Framed openings
- Personnel and overhead doors
- Vents, skylights, and other integrated components
- Many accessories are installed in conjunction with wall or roof sheeting—proper alignment is essential.
- Install each item carefully to maintain both weather-tightness and finished appearance.
- Use the correct sealants, fasteners, and methods as indicated in the drawings.
- Trim, flashing, and closures must be sealed precisely to prevent leaks and ensure long-term performance.
Common Mistakes to Avoid During Assembly
- Skipping the manual or drawings:
Always review the provided manual and erection drawings before starting. Skipping them can lead to misaligned parts or incorrect installation sequences.
- Not verifying anchor bolt placement:
An incorrect anchor bolt layout is one of the most costly errors to correct. Always double-check measurements before raising frames.
- Skipping temporary bracing:
Bracing during frame erection is essential for safety and alignment. Never rely on partial stability.
- Over-tightening bolts too early:
Fully tightening bolts before plumbing and squaring can lock misalignments into place. Always follow the correct sequence.
- Walking on unsupported roof panels:
Standing on panel ribs or unfastened sheets can damage the lap joints or cause leaks. Use walk boards to distribute weight.
- Ignoring drill shavings:
Metal filings left on panels can rust quickly and stain surfaces. Wipe panels and sweep base trims regularly.
- Improper fastener use or spacing:
Using incorrect fasteners, or placing them too close or too far apart, can affect structural integrity and weatherproofing.
Recommended Tools and Safety Equipment
To ensure a safe and efficient assembly, we recommend the following:
- PPE: Gloves, hard hats, boots, safety glasses, harnesses
- Lifting equipment: Forklift, crane, spreader bars, slings
- Power tools: Torque-controlled screw guns (75–125 ft-lbs), hammer drills, nibblers
- Layout tools: Tape measures, chalk lines, levels, straight edges
- Other: Mallets, caulking gun, fire extinguisher, first aid kit, generator
Do not use impact tools for sheeting, as they may compromise panel finishes or fastener performance.
Final Inspection and Clean-Up
Before wrapping up, perform a full walkaround:
- Confirm fastener tightness on all panels and frame joints
- Check doors and accessories for proper function
- Look for any panel misalignments or scratches
- Sweep off metal shavings and dust from panels and flashing
- Remove all debris and packaging from the site
The final steps in building a steel building should leave a clean, professional-looking project—ready for years of use.
Norsteel Support Every Step of the Way
Whether you are assembling an EasyBuild kit or a large Rigid Frame structure, Norsteel is here to support your project. Our buildings arrive with clear drawings, labelled parts, and responsive customer service to guide you from delivery to final bolt.
If you have questions during assembly—or want to speak with a consultant—get in touch. We’re happy to help you every step of the way.
You can access detailed digital assembly manuals on our Manuals page.

Building a steel building is a rewarding process when backed by a reliable system and knowledgeable support. With careful assembly, proper tools, and a step-by-step approach, your structure will stand strong and look sharp for decades.
Ready to get started on your steel building project? Contact Norsteel today for a free quote or expert guidance.
